- 24
- Jan
Introduction to the installation method and operation steps of box-type resistance furnace
Kurulum yöntemine giriş ve çalışma adımları kutu tipi dirençli fırın
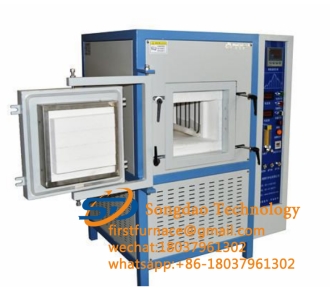
Kutu tipi rezistans fırını deneysel fırın olarak da adlandırılabilir. Endüstride yaygın olarak kullanılan yüksek sıcaklıkta ısıl işlem deney ekipmanıdır. Kurulumu ve kullanımı nispeten kolaydır. Yalnızca aşağıdaki kutu tipi fırın kurulum yöntemlerini, çalıştırma adımlarını ve çalıştırma önlemlerini hatırlamanız yeterlidir.

1. Kutu tipi rezistans fırını özel kurulum gerektirmez, sadece düz bir iç mekan çimento zemine veya bir tezgah üzerine yerleştirilmesi gerekir. Ahşap bir test tezgahına yerleştirilecekse, kutu fırının tabanı ısı yalıtımlı ve alev geciktirici bir panel ile doldurulmalıdır. Kutu fırının kontrolörü de düz bir zemin veya tezgah üzerine yerleştirilmeli ve tezgahın eğimi 5 dereceyi geçmemelidir; kontrolör ve elektrikli fırın arasındaki mesafe 50 cm’den fazla olmalıdır. Kontrolörün normal çalışmasını etkilememek için kontrolör elektrikli soba üzerine yerleştirilemez. Kontrolöre ve elektrikli fırına bağlı güç kablosu, şalter ve sigortanın yük kapasitesi, elektrikli fırının nominal gücünden biraz daha büyük olmalıdır.
2. Kablolama yaparken, önce kontrolör kabuğunun sol ve sağ tarafındaki vidaları gevşetin, ardından kapağı yukarı çevirin ve güç kablosunu şekilde gösterildiği gibi bağlayın. Nötr hat tersine çevrilemez. Güvenli çalışma için kontrolör ve elektrikli fırın güvenilir bir şekilde topraklanmalıdır.
3. Kutu tipi dirençli fırın ve kontrolör, bağıl sıcaklığın %85’i geçmediği ve iletken toz, patlayıcı gaz veya aşındırıcı gazın olmadığı bir yerde çalışmalıdır. Gres veya benzeri metal malzemenin ısıtılması gerektiğinde, büyük miktarda uçucu gaz, elektrikli ısıtma elemanının yüzeyini etkileyerek aşındırarak tahrip olmasına ve ömrünün kısalmasına neden olur. Bu nedenle, zamanla ısınma önlenmeli ve çıkarmak için kap kapatılmalı veya uygun şekilde açılmalıdır. Kutu fırın kontrolörü, ortam sıcaklığı -10-75 ℃ aralığı ile sınırlandırılmalıdır.
4. After checking that the wiring is correct, you can turn on the power. First, turn on the power switch, then pull the button switch on the controller panel to the open position, adjust the setting button, and set the temperature to the degree you need, if Pull the setting switch to the measuring position, the red light is off (NO), there is also the sound of the contactor, the electric furnace is energized, the ammeter indicates the heating current value, and the temperature rises slowly with the increase of the temperature in the furnace, indicating that the work is normal; When the temperature of the box furnace rises to the set required temperature, the red light is off (NO) and the green light is on (YES), the electric furnace is automatically powered off and the temperature is stopped. Later, when the temperature in the furnace drops slightly, the green light is off and the red light is on, and the electric furnace is automatically energized. The cycle repeats to achieve the purpose of automatically controlling the temperature in the furnace.
5. After use, first turn off the button switch on the control panel, and then cut off the main power switch.
6. Regularly check whether the wiring of the muffle furnace and the controller is in good condition, whether the pointer of the indicator is stuck or stagnated when moving, and use the potentiometer to verify the fatigue of the meter due to magnetic steel, demagnetization, wire expansion, and shrapnel , Increased error caused by balance failure, etc.
