
- 06
- Nov
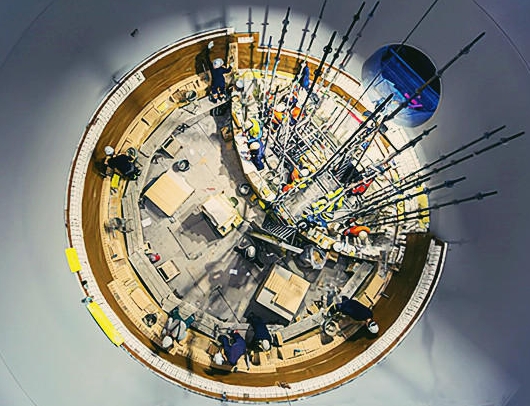
Integral refractory lining construction of hot blast stove, from the bottom of the furnace to the furnace top lining construction process~
Integral refractory lining construction of hot blast stove, from the bottom of the furnace to the furnace top lining construction process~
The construction plan for the overall lining of the blast furnace hot blast stove is shared by the refractory brick manufacturers.
1. Grouting construction at the bottom of hot blast stove:
After the bottom of the hot blast stove is leveled with gravel, refractory mud should be used to fill the gap between the gravel to enhance its sealing and strength.
The grouting process is:
(1) Use a high-pressure pump to press in the refractory mud, stop grouting when another grouting port pops out or the grouting rubber pipe head bursts off, and start grouting at the next grouting port.
(2) After the full grouting stops the pressure, use a wooden plug or pipe blockage to seal the grouting opening. After all the grouting pipes are full of grouting and the refractory slurry is solidified, remove the grouting pipe, and then use the steel plate to seal and weld the orifice.
2. Construction of castable at the bottom of hot blast stove:
(1) The proportion of the castable, the amount of water added, and the mixing and construction should be strictly carried out in accordance with the factory instructions for the castable.
(2) During the pouring process, the surface elevation and flatness of the castable should be checked at any time. It should be controlled by the elevation line marked on the grate column and the furnace shell, and the combustion chamber should be controlled by welded steel bars.
3. The lining of the hot blast stove:
Use the offset method to pull out the center line of the cross between the grate and the combustion chamber, and mark the arc of the wall and the auxiliary line of the combustion chamber wall with the arc board.
(1) Furnace wall masonry:
1) Put the ceramic fiber felt close to the surface of the spray coating layer of the furnace body, and the fiber felt should be close together, and the thickness should meet the design and construction requirements.
2) After the ceramic fiber felt construction is completed, start to build light-weight thermal insulation bricks, and finally build heavy-weight refractory bricks for the working layer.
3) Build the wall of the combustion chamber first, then build the wall of the regenerator, and finally build the checker bricks, and repeat the upward construction to the same height.
(2) Combined brick masonry:
1) First, pull out the bottom elevation of the outermost ring composite brick of the lower semicircle and mark it on the furnace shell, and install a center wheel rod at the center of the hole to control the masonry radius.
2) Build the lower half-ring composite bricks first, from the outer ring to the inner ring. After the lower half-circle masonry is completed, set up the semi-circular arch tires and start to build the upper half-circle composite bricks.
(3) Checkered brick masonry:
1) Check the horizontal elevation, flatness and grid hole position of the grate, etc., all should meet the design and construction requirements.
2) After confirming that the grate is qualified, pull out the checker brick layer height line on the large wall and mark the masonry grid line.
3) After the checker bricks on the first floor are pre-placed, check and adjust the checker brick table and grid positions.
4) The size of the expansion joint between the checker brick and the wall should be 20-25mm, and be wedge tight with a wooden wedge.
5) According to the design arrangement requirements of the second and third layers of checker bricks, the masonry grid lines are also marked on the wall. The masonry and arrangement of the fourth layer are the same as the first layer, and the staggered size of the upper and lower layers is allowed. The deviation should not be greater than 3mm.
(4) Masonry of the vault of the hot blast stove:
1) Determine the height line of the refractory brick masonry layer of the first layer of the cylindrical section according to the elevation of the lower surface of the catenary arch foot joint brick. Confirm qualified.
2) The upper surface of the masonry at the pallet ring shall be leveled with high-strength castable.
3) Determine the position of the control center of the cylindrical section according to the center of the top hole.
4) After the combustion chamber and checker bricks are built and the quality is confirmed to be qualified, start to install the center wheel plate.
Use a rubber pad to cover the entire regenerator, then remove the combustion chamber hanging plate, and use a protective shed to completely cover the combustion chamber. Install the central rotating shaft, fix it up and down on the center of the sky hole and on the rubber pad, install the radian template, and mark the brick layer height line on the board.
5) As the masonry height of the columnar section of the vault rises, the scaffold erection height is raised synchronously.
6) When building the columnar section of the vault, the surface flatness should be checked at any time, and the allowable error of control should be adjusted to be less than 1mm in time.
(5) After finishing the construction of the cylindrical section of the vault, start to build the joint bricks. The joint brick masonry should be carried out from bottom to top. The joint bricks are laid first and then the joint bricks are laid.
1) For the masonry of the lower joint bricks, the convex joint bricks should be laid first, and the expansion joints should be reserved according to the construction requirements during the masonry, and the joints should be filled with expansion joints and fixed with iron wires.
2) The masonry surface of convex joint bricks should be checked at any time for its elevation, flatness and masonry radius, and there should be no misalignment phenomenon, and the arc transition should be smooth.
3) After the masonry of the convex joint bricks is completed, start to build the concave joint bricks. Since this joint brick does not use refractory mud for masonry, small wooden wedges should be used to fix it before masonry.
4) When laying to the upper joint layer, the masonry method is the same, but there is no need to reserve expansion joints.
(6) When the vault top is laid to the range of about 1.5~2.0m from the chaotian hole, start to set the arch tyre masonry to build the curved vault top position.
As the masonry height of the arc-shaped vault rises, the inclination gradually becomes larger. At this time, hook cards should be used to increase the stability of the masonry refractory bricks.