- 07
- Apr
Manufacturing method and heat treatment of shaft forgings
Manufacturing method and heat treatment of shaft forgings
1. Manufacturing method and heat treatment of shaft forgings
(1) Material
In single-piece small batch production, the rough shaft forgings often use hot-rolled bar stock.
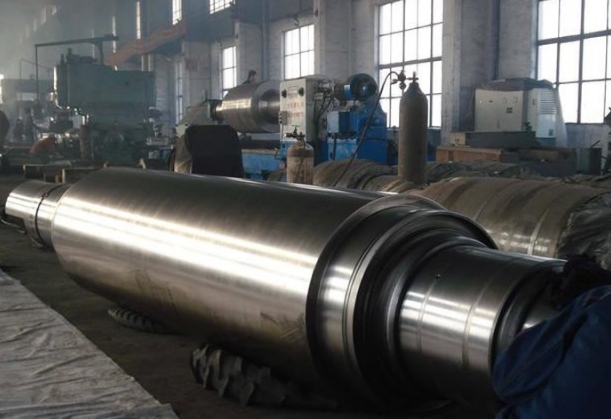
For stepped shafts with large diameter differences, in order to save materials and reduce the amount of labor for machining, forgings are often used. Stepped shafts produced in small batches of a single piece are generally free forging, and die forging is used in mass production.
(2) Heat treatment
For 45 steel, after quenching and tempering (235HBS), local high-frequency quenching can make the local hardness reach HRC62~65, and then after proper tempering treatment, it can be reduced to the required hardness (for example, CA6140 spindle is specified as HRC52) .
9Mn2V, which is a manganese-vanadium alloy tool steel with a carbon content of about 0.9%, has better hardenability, mechanical strength and hardness than 45 steel. After proper heat treatment, it is suitable for the dimensional accuracy and stability requirements of high-precision machine tool spindles. For example, the universal cylindrical grinder M1432A headstock and grinding wheel spindle use this material.
38CrMoAl, this is a medium-carbon alloy nitrided steel. Because the nitriding temperature is 540-550℃ lower than the general quenching temperature, the deformation is smaller and the hardness is also high (HRC>65, center hardness HRC>28) and excellent Therefore, the headstock shaft and grinding wheel shaft of the high-precision semi-automatic cylindrical grinder MBG1432 are made of this kind of steel.
In addition, for shaft forgings with medium precision and high speed, alloy structural steels such as 40Cr are mostly used. After quenching and tempering and high-frequency quenching, this type of steel has high comprehensive mechanical properties and can meet the requirements of use. Some shafts also use ball bearing steel such as GCr15 and spring steel such as 66Mn. After quenching and tempering and surface quenching, these steels have extremely high wear resistance and fatigue resistance. When shaft parts are required to work under high-speed and heavy-load conditions, low-carbon gold-containing steels such as 18CrMnTi and 20Mn2B can be selected. These steels have high surface hardness, impact toughness and core strength after carburizing and quenching, but The deformation caused by heat treatment is larger than that of 38CrMoAl.
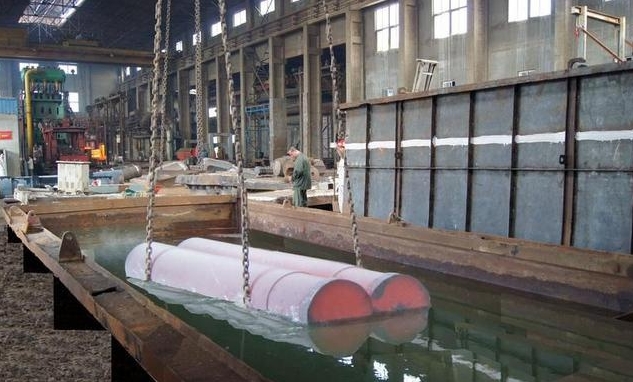
For spindles that require local high-frequency quenching, the quenching and tempering treatment should be arranged in the previous process (some steels are normalized). When the blank margin is large (such as forgings), the quenching and tempering should be placed after the rough turning. Before finishing turning, so that the internal stress caused by rough turning can be eliminated during quenching and tempering; when the blank margin is small (such as bar stock), quenching and tempering can be carried out before rough turning (equivalent to semi-finishing turning of forgings). High-frequency quenching treatment is generally placed after semi-finishing turning. Since the spindle only needs to be hardened locally, there are certain requirements for accuracy and no hardening part processing, such as threading, keyway milling and other processes, are arranged in local quenching and roughing. After grinding. For high-precision spindles, low-temperature aging treatment is required after local quenching and rough grinding, so that the metallographic structure and stress state of the spindle remain stable.

Shaft forgings
Second, the choice of positioning datum
For solid shaft forgings, the fine datum surface is the center hole, which satisfies datum coincidence and datum uniformity. For hollow spindles like CA6140A, in addition to the center hole, there is an outer circle surface of the journal and the two are used alternately, serving as a datum for each other.
Three, the division of processing stages
Each machining process and heat treatment process in the spindle machining process will produce machining errors and stresses to varying degrees, so the machining phases must be divided. Spindle machining is basically divided into the following three stages.
(1) Rough machining stage
1) Blank processing. Blank preparation, forging and normalizing.
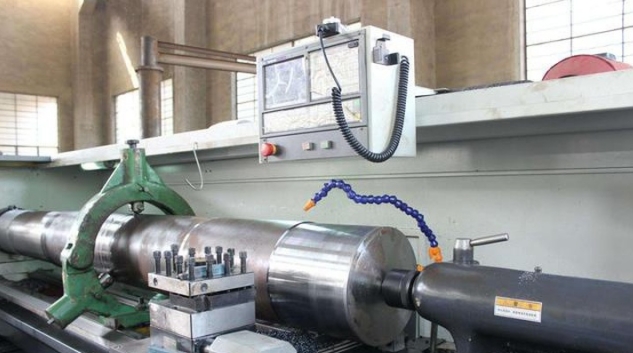
2) Rough machining saw to remove the excess part, milling the end face, drilling the center hole and the outer circle of the waste car, etc.
(2) Semi-finishing stage
1) Heat treatment before semi-finishing processing is generally used for 45 steel to achieve 220-240HBS.
2) Semi-finishing turning process taper surface (positioning taper hole) semi-finishing turning outer circle end face and deep hole drilling, etc.
(3), finishing stage
1) Heat treatment and local high frequency quenching before finishing.
2) All kinds of rough grinding of positioning cone, rough grinding of outer circle, milling of keyway and spline groove, and threading before finishing.
3) Finishing and grinding the outer circle and inner and outer cone surfaces to ensure the accuracy of the most important surface of the spindle.

Shaft forgings
Fourth, the arrangement of the processing sequence and the determination of the process
For shaft forgings with hollow and inner cone characteristics, when considering the processing sequence of main surfaces such as supporting journals, general journals and inner cones, there are several options as follows.
①Rough machining of outer surface→drilling deep holes→finishing of outer surface→roughing of taper hole→finishing of taper hole;
②Outer surface roughing→drilling deep hole→taper hole roughing→taper hole finishing→outer surface finishing;
③Outer surface roughing→drilling deep hole→taper hole roughing→outer surface finishing→taper hole finishing.
For the processing sequence of the CA6140 lathe spindle, it can be analyzed and compared like this:
The first scheme: During the rough machining of the tapered hole, the precision and roughness of the outer circle surface will be damaged because the excircle surface that has been finish machined is used as the fine reference surface, so this scheme is not suitable.
The second solution: When finishing the outer surface, the taper plug should be inserted again, which will destroy the accuracy of the taper hole. In addition, there will inevitably be machining errors when processing the taper hole (the grinding conditions of the taper hole are worse than the external grinding conditions, and the error of the taper plug itself will cause the difference between the outer circular surface and the inner cone surface. Shaft, so this scheme should not be adopted.
The third solution: In the finishing of the taper hole, although the surface of the outer circle that has been finished must be used as the finishing reference surface; but because the machining allowance of the finishing of the taper surface is already small, the grinding force is not large; at the same time, the taper The finishing of the hole is in the final stage of shaft machining, and has little effect on the accuracy of the outer circular surface. In addition to the processing sequence of this scheme, the outer circular surface and the tapered hole can be used alternately, which can gradually improve the coaxiality. Spend.
Through this comparison, it can be seen that the processing sequence of shaft forgings such as the CA6140 spindle is better than the third option.
Through the analysis and comparison of the schemes, it can be seen that the sequential processing order of each surface of the shaft forging is largely related to the conversion of the positioning datum. When the rough and fine datums for part processing are selected, the processing sequence can be roughly determined. Because the positioning datum surface is always processed first at the beginning of each stage, that is, the first process must prepare the positioning datum used for the subsequent process. For example, in the process of the CA6140 spindle, the end face is milled and the center hole is punched from the beginning. This is to prepare the positioning datum for the outer circle of rough turning and semi-finishing turning; the outer circle of semi-finishing turning prepares the positioning datum for deep hole machining; the outer circle of semi-finishing turning also prepares the positioning datum for the front and back taper hole machining. Conversely, the front and rear taper holes are equipped with the top hole after taper plugging, and the positioning datum is prepared for the subsequent semi-finishing and finishing of the outer circle; and the positioning datum for the final grinding of the taper hole is the journal that has been ground in the previous process. surface.

Shaft forgings
5. The process should be determined according to the processing sequence, and two principles should be mastered:
1. The positioning datum plane in the process should be arranged before the process. For example, deep hole processing is arranged after rough turning on the outer surface in order to have a more accurate journal as the positioning reference surface to ensure uniform wall thickness during deep hole processing.
2. The processing of each surface should be separated for rough and fine, first rough and then fine, multiple times to gradually improve its accuracy and roughness. The finishing of the main surface should be arranged at the end.
In order to improve the metal structure and processing performance, the heat treatment process, such as annealing, normalizing, etc., should generally be arranged before mechanical processing.
In order to improve the mechanical properties of shaft forgings and eliminate internal stress, the heat treatment process, such as quenching and tempering, aging treatment, etc., should generally be arranged after rough machining and before finishing.
